- Have you ever tried to mount an filesystem securely over the world wide internetwork :)
install the small tool SSHFS (apt-get install sshfs)
You can now mount any remote filesystems DIR you have access to:$ sshfs user@remote2:/home/user/documents /mnt
- Send an Command directly via SSH without login in and have to log out again after execution: this command will simply power off an remote machine!
$ ssh user@remotehost sudo poweroff
- If you have any long command you like to execute on an remote system you can also save it to any file as simple text and then run it remotly using:
$ ssh user@remotehost "`cat filename.txt`"
- The
ssh-copy-idcommand is not as well-known as it should be, which is a shame because it is a great time-saver. This nifty command copies your public key to a remote host in the correct format, and to the correct directory. It even has a safety check that won't let you copy a private key by mistake. Specify which key you want to copy, like this:$ ssh-copy-id -i .ssh/id_rsa.pub user@remote
- Use
ssh-keygento remove host keys from the~/.ssh/known_hostsfile to save some time. When the remote machine gets new SSH keys you'll get a warning, when you try to log in, that the key has changed. Using this is much faster than manually editing the file and counting down to the correct line to delete:$ ssh-keygen -R remote-hostname
- When you're at the mercy of hotel and coffee shop Internet, a nice secure SSH tunnel makes your online adventures safer. To make this work you need a server that you control to act as a central node for escaping from hotspot follies. I have a server set up at home to accept remote SSH logins, and then use an SSH tunnel to route traffic through it. This is useful for a lot of different tasks. For example I can use my normal email client to send email, instead of hassling with Web mail or changing SMTP server configuration, and all traffic between my laptop and home server is encrypted. First create the tunnel to your personal server:
$ ssh -f carla@homeserver.com -L 9999:homeserver.com:25 -N

"this command will open locally port 9999 to static connect to
port 25 on your remote machine, though that port needs to be
opened up there, you can now use your mail client or for
sending mails (port 25 smtp) via your home pc without trouble
of getting spyed just set your SMTP port in your client to port 9999! - Bypass untrusted networks the easy way, lets say you want to browse the web and you have restrictions in your actual network just forward your traffic over ssh:
$ ssh -D 9999 -C user@homeserver.com

"now set ip/hostname and port in your Internet Browser eg.
Firefox and keep on browsing the web securely :)"
Tuesday, March 27, 2012
Advanced SSH tricks Linux
Today i will show you some SSH tricks that could be usefull! Well ssh is more powerfull than you thoght maybe - so check out the following little helpers to get your ssh life easier!
Tuesday, March 20, 2012
Be aware of Java ware
"A hard-to-detect piece of malware that doesn't create any files on the affected systems was dropped onto the computers of visitors to popular news sites in Russia in a drive-by download attack, according to Kaspersky Lab. 'What's interesting about this particular attack is the type of malware that was installed in cases of successful exploitation:

It's ideal to stop the infection in its early stages, because once this type of "fileless" malware gets loaded into memory and attaches itself to a trusted process, it's much harder to detect by antivirus programs.'"

It's ideal to stop the infection in its early stages, because once this type of "fileless" malware gets loaded into memory and attaches itself to a trusted process, it's much harder to detect by antivirus programs.'"
Thursday, March 15, 2012
Redmine - apache - ruby - Install in debian >= 5.0
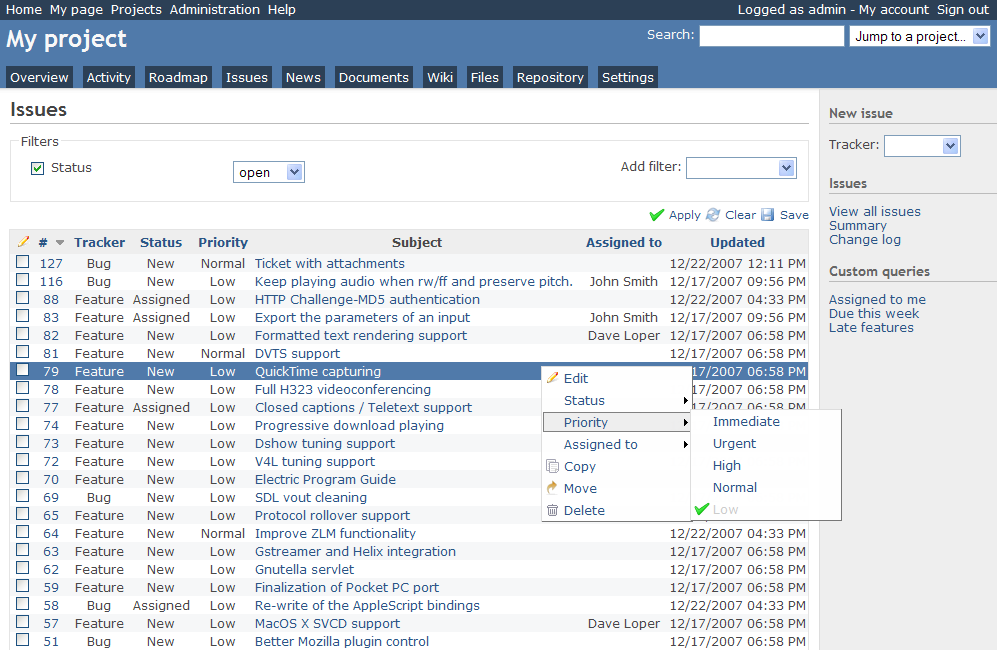
Redmine
Redmine is a flexible project management web application. Written using the Ruby on Rails framework, it is cross-platform and cross-database.
Redmine is open source and released under the terms of the GNU General Public License v2 (GPL).
Some of the main features of Redmine are:
- Multiple projects support
- Flexible role based access control
- Flexible issue tracking system
- Gantt chart and calendar
- News, documents & files management
- Feeds & email notifications
- Per project wiki
- Per project forums
- Time tracking
- Custom fields for issues, time-entries, projects and users
- SCM integration (SVN, CVS, Git, Mercurial, Bazaar and Darcs)
- Issue creation via email
- Multiple LDAP authentication support
- User self-registration support
- Multilanguage support
- Multiple databases support
First of all make sure you are running an yet stable and configured Apache server.
It will either need mod_cgi or mod_fastcgi to get redmine up and running properly. I prefered mod_f(ast)cgi. Lets check if you already installed these mods:
ls /etc/apache2/mods-available | grep cgiyour result will be something like
cgid.conf, cgid.load, cgi.load, fcgid.conf, fcgid.load
if nothing appears in your output the enter the following commands to install FastCGI:
This will download install and enable the required mods for your apache installation.apt-get install apache2-mpm-worker apache2-suexec php5-cgi libapache2-mod-fcgid
a2enmod fcgid
a2enmod suexec
To test if they are enabled enter:
ls /etc/apache2/mods-enabled | grep cgiYout output should look the same as above when we used mods-available, if so we are ready to go.
Lets go ahead: for this tut i will use Redmine 1.3 yet stable version. So lets go check it out!
(you will need subversion to do this, available in every debian repository)
apt-get install subversionlets change to our redmine destination directory and fetch it where apache should serve the needed files for the clients:
cd /var/www/yourwebpage/subdomain/httpdocsChange to the Donwloaded dir and lets have look at the INSTALL File where we can see our dependencies and software that will be needed.
(you can choose any other folder you like to share as a webpage, /var/www is just common)svn co http://redmine.rubyforge.org/svn/branches/1.3-stable redmine-1.3
svn co svn://rubyforge.org/var/svn/redmine/branches/1.3-stable redmine-1.3
mv 1.3-stable redminewell i will Post the Install file here so you dont need to have it opened in your terminal if you use the 1.3 mentioned version of redmine here!
cd redmine
(nano doc/INSTALL)
==================================================================So lets go get these Programs and appropriate versions running!
== Redmine installation
Redmine - project management software
Copyright (C) 2006-2010 Jean-Philippe Lang
http://www.redmine.org/
== Requirements
* Ruby 1.8.6 or 1.8.7
* RubyGems 1.3.1
* Ruby on Rails 2.3.5 (official downloadable Redmine releases are packaged with
the appropriate Rails version)
* Rack 1.0.1 gem
* Rake 0.8.3 gem
* I18n 0.4.2 gem
* A database: (only one of these 3 is needed here... i hope you know how to set up MySQL DB!)
* MySQL (tested with MySQL 5)
* PostgreSQL (tested with PostgreSQL 8.1)
* SQLite (tested with SQLite 3)
==================================================================
apt-get install libapache-ruby1.8 ruby1.8 libgems-ruby1.8 rubygems1.8 libgemplugin-ruby1.8 rails librack-ruby1.8 rake passenger-common libapache2-mod-passengerNow we have to get our gems for ruby to get things working:
gem sources -a http://production.s3.rubygems.org/Well done ruby up and runnnig with our needed gems (the first command is for changing the source, you will probybly get an error if you dont do so as debian got a false source provided in standard configuration)
gem sources -u
gem install activerecord -v=2.3.14
gem install actionpack -v=2.3.14
gem install actionmailer -v=2.3.14
gem install activeresource -v=2.3.14
gem install activesupport -v=2.3.14
gem install rails -v=2.3.14
gem install passenger -v=3.0.11
gem install rake -v=0.9.2.2
gem install rack -v=1.1.2
gem install i18n -v=0.4.2
Now follow this guide on the Redmine Production website and you should be good to go to get it running straigt away!
http://www.redmine.org/projects/redmine/wiki/RedmineInstall
or follow me here:
or follow me here:
After following this guide you should be able to log into redmin
Any questions left? feel free to comment here and give me advice or ask for help!
/etc/init.d/apache2 restartApache should be restarted and your redmin should be reachable where you placed it on your webserver! Login with user: admin password: admin
Any questions left? feel free to comment here and give me advice or ask for help!
Subscribe to:
Posts (Atom)