Redmine
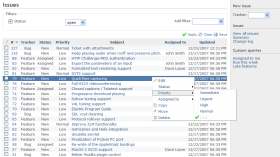
Redmine is a flexible project management web application. Written using the Ruby on Rails framework, it is cross-platform and cross-database.
Redmine is open source and released under the terms of the GNU General Public License v2 (GPL).
Some of the main features of Redmine are:
- Multiple projects support
- Flexible role based access control
- Flexible issue tracking system
- Gantt chart and calendar
- News, documents & files management
- Feeds & email notifications
- Per project wiki
- Per project forums
- Time tracking
- Custom fields for issues, time-entries, projects and users
- SCM integration (SVN, CVS, Git, Mercurial, Bazaar and Darcs)
- Issue creation via email
- Multiple LDAP authentication support
- User self-registration support
- Multilanguage support
- Multiple databases support
First of all make sure you are running an yet stable and configured Apache server.
It will either need mod_cgi or mod_fastcgi to get redmine up and running properly. I prefered mod_f(ast)cgi. Lets check if you already installed these mods:
ls /etc/apache2/mods-available | grep cgiyour result will be something like
cgid.conf, cgid.load, cgi.load, fcgid.conf, fcgid.load
if nothing appears in your output the enter the following commands to install FastCGI:
This will download install and enable the required mods for your apache installation.apt-get install apache2-mpm-worker apache2-suexec php5-cgi libapache2-mod-fcgid
a2enmod fcgid
a2enmod suexec
To test if they are enabled enter:
ls /etc/apache2/mods-enabled | grep cgiYout output should look the same as above when we used mods-available, if so we are ready to go.
Lets go ahead: for this tut i will use Redmine 1.3 yet stable version. So lets go check it out!
(you will need subversion to do this, available in every debian repository)
apt-get install subversionlets change to our redmine destination directory and fetch it where apache should serve the needed files for the clients:
cd /var/www/yourwebpage/subdomain/httpdocsChange to the Donwloaded dir and lets have look at the INSTALL File where we can see our dependencies and software that will be needed.
(you can choose any other folder you like to share as a webpage, /var/www is just common)svn co http://redmine.rubyforge.org/svn/branches/1.3-stable redmine-1.3
svn co svn://rubyforge.org/var/svn/redmine/branches/1.3-stable redmine-1.3
mv 1.3-stable redminewell i will Post the Install file here so you dont need to have it opened in your terminal if you use the 1.3 mentioned version of redmine here!
cd redmine
(nano doc/INSTALL)
==================================================================So lets go get these Programs and appropriate versions running!
== Redmine installation
Redmine - project management software
Copyright (C) 2006-2010 Jean-Philippe Lang
http://www.redmine.org/
== Requirements
* Ruby 1.8.6 or 1.8.7
* RubyGems 1.3.1
* Ruby on Rails 2.3.5 (official downloadable Redmine releases are packaged with
the appropriate Rails version)
* Rack 1.0.1 gem
* Rake 0.8.3 gem
* I18n 0.4.2 gem
* A database: (only one of these 3 is needed here... i hope you know how to set up MySQL DB!)
* MySQL (tested with MySQL 5)
* PostgreSQL (tested with PostgreSQL 8.1)
* SQLite (tested with SQLite 3)
==================================================================
apt-get install libapache-ruby1.8 ruby1.8 libgems-ruby1.8 rubygems1.8 libgemplugin-ruby1.8 rails librack-ruby1.8 rake passenger-common libapache2-mod-passengerNow we have to get our gems for ruby to get things working:
gem sources -a http://production.s3.rubygems.org/Well done ruby up and runnnig with our needed gems (the first command is for changing the source, you will probybly get an error if you dont do so as debian got a false source provided in standard configuration)
gem sources -u
gem install activerecord -v=2.3.14
gem install actionpack -v=2.3.14
gem install actionmailer -v=2.3.14
gem install activeresource -v=2.3.14
gem install activesupport -v=2.3.14
gem install rails -v=2.3.14
gem install passenger -v=3.0.11
gem install rake -v=0.9.2.2
gem install rack -v=1.1.2
gem install i18n -v=0.4.2
Now follow this guide on the Redmine Production website and you should be good to go to get it running straigt away!
http://www.redmine.org/projects/redmine/wiki/RedmineInstall
or follow me here:
or follow me here:
After following this guide you should be able to log into redmin
Any questions left? feel free to comment here and give me advice or ask for help!
/etc/init.d/apache2 restartApache should be restarted and your redmin should be reachable where you placed it on your webserver! Login with user: admin password: admin
Any questions left? feel free to comment here and give me advice or ask for help!

No comments:
Post a Comment